In this holiday, gift yourself a nice little word processor that you can use yourself! You can further develop it. It happily supports Unicode and lets you learn the use of Toolbar, RichMemo, ImageLists, File Save Management and more.
Plain text means any text which has no special styling or formatting. All the text from start to end is of same style. It’s just plain simple text and nothing else. For example, you can create plain text in Windows Notepad, Notepad++, GEdit etc.
Rich text on the other hand has special formatting added to it behind the scenes. For example, if you create documents in MS Word or Libre Office, you can add styles to it, like bold, underline etc. Under the hood those style information are saved with the text. So it is not only the text. There has to be some style saved with it. It has complex styling involved.
Today, we are going to make a simple rich text editor. Think of it as a Christmas gift to yourself!
Lazarus has a good component for rich text editing – TRichMemo. If you think of all the complexities of managing all the characters and their styles then let me assure you that it is easier than you think. Don’t worry a bit, it is going to be a breeze making that rich text editor. Just keep following my gifty words. ;)
( Thanks to Jørn Erik for requesting a tutorial for RichMemo. )
Tutorial
Install RichMemo
TRichMemo component doesn’t come pre-installed with Lazarus. So first, download RichMemo component package.
The wiki has a direct download link. But for this bug it is recommended to use the SVN or Subversion (Wikipedia). I have also used the SVN version. But if you are afraid to use SVN you can use my copy which is RichMemo 3400 revision.
For SVN, the URL is:
https://lazarus-ccr.svn.sourceforge.net/svnroot/lazarus-ccr/components/richmemo
[ If you want to use the svn version, install Subversion for windows, then cd to a directory that you want to download. Such as:
cd /D C:lazaruscomponents
After that run:
svn co https://lazarus-ccr.svn.sourceforge.net/svnroot/lazarus-ccr/components/richmemo richmemo
The above command will save the package in richmemo folder in the components folder of Lazarus. So you won’t have to manually copy it. Cool! Just check if the Lazarus installation directory is ok in the cd command. ]
Now copy the directory to C:lazaruscomponents (if you used the direct link option).

Now enter into the directory and double click richmemopackage.lpk file. Lazarus will open with an extra window having the title package name.

Now click Compile. After the compiling is completed, you will see a message in the Messages window. Then click Use -> Install. A message will appear that if we want to rebuild Lazarus. Click Yes.
Eventually Lazarus will restart with the new TRichMemo installed. If you can’t find the component, look for it under the “Common Controls” tab. Congratulations, if you have installed it!
Starting with the basics
So go ahead and create a new Application Project (Project -> New Project -> Application -> OK). Resize the form to an appropriate size to make room for the components.
And now, the center of our attention – Drop a TRichMemo on the form. Set the ScrollBars property to ssBoth.
Now the toolbar. Draw a TToolBar on the form (from Common Controls tab). Resize it from the bottom to a gentle size. Draw a TImageList as well, anywhere in the form (from the Common Controls tab). It doesn’t matter where you put it because it will disappear on runtime. This image list will contain our toolbar icons.
Here is our form so far:

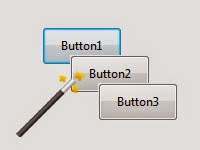
We’ll now add items to the toolbar. Right click the Toolbar1 component then select New Button.

You will notice that a new TToolButton appearing on the Object Inspector.

The Ttoolbar and TToolButton is two separate object. You will see a little area at the top left corner of TToolbar.

If you click on it you can select the toolbar button. On the other hand you can click on the sunk area to select the TToolbar object. To make the buttons more visible to us, go ahead and select the TToolbar object. Then set its ShowCaptions property to True. Now you can easily see the toolbar buttons’ Captions.

Prepping the Image List
We will now prepare our Image list. Yes, the little component that will keep our toolbar icons. Right click it and select ImageList Editor… (or you can double click it as well).

Now add the images for the toolbar in the following manner. I have used FamFamFam.com Slik Icons. You can also download it. So here are the indexes and the file names for icons:
0. page_white_office.png
1. folder_page.png
2. disk.png
3. text_bold.png
4. text_italic.png
5. text_underline.png
Your ImageList Editor dialog should look like this:

Now select the Toolbar1 component and set its Images property as ImageList1. This will let us set images from the ImageList through the index of the icons. You will get it in a moment.
Cooking the toolbar!
Now prepare your toolbar elements like this:
1. btnNew: TToolButton (which means right click the toolbar and create a new toolbar button and set its name as btnNew)
(Now set its properties as follows:)
Caption = New
ImageIndex = 0 (You can see the icons in the drop down menu of this property. Its very easy to understand which icon you are selecting.)
You will probably see the icons being cut. That’s normal. This is because the toolbar button size is so little. So set the Toolbar1’s ButtonHeight property to 36. Also set its AutoSize to True which will set the height of the toolbar automatically.
2. btnOpen: TToolButton
Caption = Open
ImageIndex = 1
3. btnSave: TToolButton
Caption = Save
ImageIndex = 2
3. Right click the toolbar and click New Separator. It will make some distance between the buttons.
4. (Right click the toolbar and select New CheckButton) btnBold: TToolButton
Caption = Bold
ImageIndex = 3
New CheckButton creates a TToolButton but sets its Style as tbsCheck. You can create a new button and change its Style property manually. Its the same.
5. (Again, New CheckButton) btnItalic: TToolButton
Caption = Italic
ImageIndex = 4
6. (New CheckButton) btnUnderline: TToolButton
Caption = Underline
ImageIndex = 5
7. Right click the toolbar and click New Separator.
8. Now we have to create a Font selector combobox. Since TCombobox cannot be created with right clicking toolbar, we will create it manually. And we will also include with it a Label saying “Font:”. We can nicely blanket the label and the combobox in a Panel so that we can keep some space. If we create those two without the panel, there can be no space between components. Also, when you will resize the form and the toolbar buttons has to be shown in two or more lines, the whole Panel would stay together:

So, first create a TPanel inside the Toolbar (when drawing it, start drawing from inside the toolbar are to create the panel as a child of the toolbar.) Its height will be automatically set to ButtonHeight of the toolbar.

Empty its caption. Create a TLabel inside it and set its Caption to “Font:”.

Now create a TComboBox inside it. Set its Name as cboFont. Now you will see that you can freely keep space between these two and you can even center them vertically, which would’ve been impossible without the Panel. Keep the combobox the way it is. We are going to load the fonts with the help code, later.

Oh! and set the BevelOuter to bvNone of the Panel to get rid of the border.
9. Create another TPanel inside the toolbar for Font Size. Set its caption to blank and BevelOuter to bvNone. Create a TLabel inside the panel. Set its Caption to “Size:”. Create a TComboBox and set its name as cboFontSize and its Items to:
8
10
12
14
16
18
26
36
72

You can optionally set its ItemIndex as 1, just as a default value.
Yaaay! The Toolbar is finished! It was the greatest complexities of this project! Now you are ready to face the rest of the project with a shine in your eyes.
Have a first look!
Now for giving it more professional look, draw a TStatusBar on the form (from Common Controls tab). The RichMemo1 is not in an exact position. Select the RichMemo1 and set its Align property to alClient.
Go ahead and test it (Run->Run or F9).

It certainly looks good but its not functional. So let’s get cookin’!
Coding it
We’re now going to bring our gorgeous new word processor to life, with code.
File management
First, the New button. Double click it and enter:
procedure TForm1.btnNewClick(Sender: TObject);
begin
RichMemo1.Clear;
Saved:=False;
Filename:=’Untitled.rtf’;
Filepath:=’’;
Caption:=Filename;
end;
Add the following variable under the first var clause:
Filename: String = ‘Untitled’;
Filepath: String;
Saved: Boolean;
So, we tell the RichMemo to be cleared and we make the Saved boolean to False, meaning that the new document is not saved. So later we can use this value to check whether the document is saved or not. May be a “Save?” dialog box would be nice, right?
Whenever the user changes the document, the Saved boolean should be turned to False. So on the OnChange event of RichMemo1 we should set it to False. So, double click RichMemo1 and enter:
procedure TForm1.RichMemo1Change(Sender: TObject);
begin
Saved:=False;
end;
Now to Open button. For a open dialog to show up we need TOpenDialog. Create one (from the Dialogs tab). Set its DefaultExt to .rtf and Filter as:
RTF Files (*.rtf)*.rtf
Now double click btnOpen and enter:
procedure TForm1.btnOpenClick(Sender: TObject);
var
fs : TFileStream;
begin
if OpenDialog1.Execute then begin
fs := nil;
try
// Utf8ToAnsi is required for windows
fs := TFileStream.Create(Utf8ToAnsi(OpenDialog1.FileName), fmOpenRead or fmShareDenyNone);
RichMemo1.LoadRichText(fs);
Saved:=True; // since we opened a saved file
Filename:=ExtractFileName(OpenDialog1.FileName);
Filepath:=ExtractFilePath(OpenDialog1.FileName);
Caption:=Filename;
except
end;
fs.Free;
end;
end;
(I have copied the above code from the accompanying sample project of RichMemo package. B-) )
For the Save button, create a TSaveDialog (from Dialogs tab). Set its DefaultExt to .rtf, and Filter to:
RTF Files (*.rtf)*.rtf
Double click btnSave and enter:
procedure TForm1.btnSaveClick(Sender: TObject);
var
fs : TFileStream;
begin
if SaveDialog1.Execute then begin
fs := nil;
try
fs := TFileStream.Create( Utf8ToAnsi(SaveDialog1.FileName), fmCreate);
RichMemo1.SaveRichText(fs);
Saved:=True;
Filename:=ExtractFileName(SaveDialog1.FileName);
Filepath:=ExtractFilePath(SaveDialog1.FileName);
Caption:=Filename;
except
end;
fs.Free;
end;
end;
Now add the following procedure to the Form‘s OnCloseQuery event (Select Form, then Object Inspector -> Events -> OnCloseQuery -> […]):
[ If you have difficulty selecting Form1, then select it from Object Inspector. ]
procedure TForm1.FormCloseQuery(Sender: TObject; var CanClose: boolean);
var
Response: Integer;
begin
if not Saved then begin
Response:=MessageDlg(‘Save?’, ‘Do you wish to Save?’,
mtConfirmation, mbYesNoCancel,0);
if Response = mrYes then begin
btnSaveClick(Sender); // we save it
CanClose:=True; // we let it close
end else if Response = mrNo then begin
CanClose:=True; // we let it close (but not save)
end else begin
CanClose:=False; // we don’t need to close
end;
end;
end;
Other Toolbar Buttons
Now that the basic file management is out of the way, we can focus on the more fun parts. We have Font list. We have to load the fonts automatically into the combobox. So on the Form‘s OnCreate event procedure we enter:
procedure TForm1.FormCreate(Sender: TObject);
begin
cboFont.Items.Assign(Screen.Fonts);
cboFont.ItemIndex:=0; // we select the first font
end;
Now we will create a procedure to update the toolbar based on where the cursor is. But first, add the variable to the first var clause of the unit:
var
…
SelFontFormat: TFontParams;
The formatting information would be stored in this variable. You see, to change the formatting, (1) first we’ll have to get the formatting in a TFontParams variable, (2) then change it and (3) apply it to the selection. For example, for making a selection Bold we’ll have to get the formatting at the beginning point of the selection, make it Bold, then set the whole selection by the new formatting. This formatting can be used in many procedures (Italic, Underline and so on) so we’ve added it in the var clause.
Then the procedure:
procedure TForm1.PrepareToolbar();
begin
cboFont.Caption:=SelFontFormat.Name;
cboFontSize.Caption:=inttostr(SelFontFormat.Size);
if (fsBold in SelFontFormat.Style = true) then
btnBold.Down:=True
else
btnBold.Down:=False;
if (fsItalic in SelFontFormat.Style = true) then
btnItalic.Down:=True
else
btnItalic.Down:=False;
if (fsUnderline in SelFontFormat.Style = true) then
btnUnderline.Down:=True
else
btnUnderline.Down:=False;
end;
Add the above procedure under the implementation clause and take your cursor in the procedure and press Ctrl+Shift+C. A forward declaration would be added under the TForm1’s declarations.
Add the following procedure to the RichMemo1‘s OnMouseDown event (Select RichMemo1, then Object Inspector -> Events -> OnMouseDown -> […]):
procedure TForm1.RichMemo1MouseDown(Sender: TObject; Button: TMouseButton;
Shift: TShiftState; X, Y: Integer);
begin
RichMemo1.GetTextAttributes(RichMemo1.SelStart, SelFontFormat);
PrepareToolbar;
end;
On the cursor position change, we get/update the formatting in SelFontFormat.
If you now open an RTF and click in places, you will see that the toolbar will be updated (the font name, bold, italic, underline etc. changes). So, it can read the style. Now we’ll write the styles.
BOLD BUTTON
Double click btnBold and enter:
procedure TForm1.btnBoldClick(Sender: TObject);
begin
if (fsBold in SelFontFormat.Style = False) then
SelFontFormat.Style:=SelFontFormat.Style + [fsBold]
else
SelFontFormat.Style:=SelFontFormat.Style - [fsBold];
RichMemo1.SetTextAttributes(RichMemo1.SelStart,
RichMemo1.SelLength, SelFontFormat);
end;
We already (1) got the formatting in the SelFontFormat, (2) we modify the formatting style and add fsBold to it (or unbold it if its already bold), (3) then apply it to the selection.
Now Run it (F9 or Run->Run). Select a text and press Bold. Voila! Your first working formatting button! I see a little smile on your face already. :)
ITALIC BUTTON
Now double click btnItalic and enter:
procedure TForm1.btnItalicClick(Sender: TObject);
begin
if (fsItalic in SelFontFormat.Style = False) then
SelFontFormat.Style:=SelFontFormat.Style + [fsItalic]
else
SelFontFormat.Style:=SelFontFormat.Style - [fsItalic];
RichMemo1.SetTextAttributes(RichMemo1.SelStart,
RichMemo1.SelLength, SelFontFormat);
end;
UNDERLINE BUTTON
Now double click btnUnderline and enter:
procedure TForm1.btnUnderlineClick(Sender: TObject);
begin
if (fsUnderline in SelFontFormat.Style = False) then
SelFontFormat.Style:=SelFontFormat.Style + [fsUnderline]
else
SelFontFormat.Style:=SelFontFormat.Style - [fsUnderline];
RichMemo1.SetTextAttributes(RichMemo1.SelStart,
RichMemo1.SelLength, SelFontFormat);
end;
FONT LIST
Now on the cboFont‘s OnSelect event procedure enter this:
procedure TForm1.cboFontSelect(Sender: TObject);
begin
SelFontFormat.Name:=cboFont.Text;
RichMemo1.SetTextAttributes(RichMemo1.SelStart,
RichMemo1.SelLength, SelFontFormat);
RichMemo1.SetFocus; // get focus to the rich memo
end;
FONT SIZE
For font size change, add the following procedure on cboFontSize‘s OnSelect event:
procedure TForm1.cboFontSizeSelect(Sender: TObject);
begin
SelFontFormat.Size:=StrToInt(cboFontSize.Text);
RichMemo1.SetTextAttributes(RichMemo1.SelStart,
RichMemo1.SelLength, SelFontFormat);
end;
Touching it up
Add the following line at the end of Form1‘s OnCreate procedure:
btnNewClick(Sender);
This will do as if the user has clicked on btnNew at the form startup. So it will create a new document, set the form’s Caption and some variables (Filename, Saved etc.) correctly.
Optionally, you can add some menus if you like to give it more professional look. You would need to draw a TMainMenu for that, double click it, and add some menus. When you select an item, the Object Inspector lets you change its properties add click event to it etc.
Now Run it (F9 or Run->Run).

Type in, open documents and test it.

There you have it! Your very own Christmas Gift! :-)
Further Improvements
Improving any source code is one of the best way to practice programing skills. You can improve the project in many ways:
- Menu commands. I have added some dummy menus. They don’t have any menus or command associated to them. You can create menus by yourself.
- Undo/Redo. There is built in undo redo feature which you can use. Add buttons in the toolbar and drag to reorder them if necessary.
- Text Color. You can easily change color through SelFontFormat.Color, just like the formatting buttons.
- Strikethrough. By using fsStrikeOut, just as we used fsBold.
- Drag and drop file feature.
- Right click menu having cut, copy, paste, delete etc. You could use TRishMemo’s CutToClipboard, CopyToClipboard and PasteFromClipboard.
Known Issues
It is just a basic implementation of RichMemo. It has some issues.
- The buttons for formatting change doesn’t work well when the selection has multiple styles applied to them. For example, if your selection has both Bold and Italic text and you click Underline, the bold and italic style will be reset making the selection underline. You can use RichMemo1.GetStyleRange to get each style and modify it accordingly. You can look into the sample project included with the component package. It has a “Next Style Range” button that detects each diferent style. The code is like this:
procedure TForm1.Button6Click(Sender: TObject);
var
ofs, len : Integer;
begin
RichMemo1.GetStyleRange( RichMemo1.SelStart, ofs, len );
if (ofs = RichMEmo1.SelStart) and (len = RichMemo1.SelLength) then begin
ofs := ofs + len;
RichMemo1.GetStyleRange( ofs, ofs, len );
end;
RichMemo1.SelStart := ofs;
RichMemo1.SelLength := len;
end;
- When you close the program with an unsaved document, press Yes, then in the dialog press Cancel, the program closes and the document is lost!
EDIT 1 (31JUL14): A download link for SVN pull has been given. Thanks to Tail for pointing out an error in his SVN pull.
Downloads
You can download the source code for the tutorial project and executable/EXE files from the links below: